Friday, May 30, 2014

Memory Quilt #1 - Ready for the Next Stage

 The top - all held together with paste, ready to add some fabric paint in a few places, including the crease in the sky and some shadows.  Then, it's time to sit at the sewing machine and sew down every little piece that has been added to the quilt top, and then do some thread painting.  When that's done, it's time for the quilt sandwich, and some quilting to finish up.  I think I'll just add facing and a sleeve to this quilt, and not worry about a border.
 Detail - My solution to a couple of problems, including the disproportionate pictures on the left.
 The tree - how many pieces?  I lost count.
And, the lone sunflower plant  - couldn't leave them all out.  That poor bird was supposed to be a meadow lark in the fabric.  Think it's tummy will become the proper yellow.

Designing and constructing this quilt top has been a lot of fun, and brought back many memories.  If Dwight hadn't been the amazing photographer he was as a "kid", with his Baby Brownie camera, we wouldn't have these incredible nostalgic pictures that are on this quilt.  I'm trying to decide what the subject of the next memory quilt will be.  By the way, no one has given me a name for this quilt?????

(This is the story that I concocted - in the picture above, you can see that I have a shadow of the actual fork.)  
Alfalfa Hay was first mown, and later raked into windrows so that it could cure in the sun.  I drove the John Deere, following the windrow of hay, and the hay was picked up by a hay loader that trailed behind the wagon, that had teeth that carried the hay up onto the wagon where my brother, Dwight, arranged and packed it.  When the wagon was full, we would head for the stack yards, where the giant derrick for the Jackson Fork was used to build large haystacks for winter use.  
    

My grandfather’s derrick for the Jackson Fork was well built of poles, and the pulley system carefully constructed.  Our team of horses, named Pet and Babe,  was hitched to the pulley system.  Grandfather would be on top of the haystack, Dad would be on the wagonload of hay, and Dwight would be ready to lead the team.  The horses would go far enough ahead to raise the large fork from the ground onto the hay wagon.  Dad would push the fork tines down into the load, and secure it.  He would give the signal to my brother, who would lead the horses ahead, so that the fork full of hay would rise from the wagon, and swing over to the haystack.  Grandpa would grab the trip rope and pull, and the hay would be deposited on top of the stack.  We often held our breaths, as the large clump of hay would threaten to cover him, but there were no mishaps.  

Thursday, May 29, 2014

Almost There - The Memory Quilt #1

I am hoping that my three sister critics will make suggestions here - not that I'll follow them, but it helps to see someone else's perspective.  Ron and I just had a good talk about the three on the right - it needs some more help to carry it up and a little more to the left.  I've had sunflowers on and sunflowers off - I just left a tiny one to the right of the  story.  Awaiting your critique and help.  I'm also trying to figure out a name of this quilt other than Memory Quilt #1.  I never could name anything without great agony - even my children.  Help!

I tried the idea of fuzzing the edges of the pictures, but that didn't work - will probably stitch around them with a narrow decorative stitch to break up the straight sides a little bit.  Like the sepia (or antique) tones much, much better than the black and white.

Thursday, May 22, 2014

Story Quilt or Memory Quilt?

 This was the first step - First plan (draw) my quilt on a piece of newsprint, then transfer that design to clear vinyl.  The parts of the quilt were also traced onto freezer paper.  Ironing the freezer paper templates to the fabric of choice makes life a lot easier.  The sky is divided(cut) into three parts, with the painted fabric on top, and a lighter print used behind the cuts.  The quilt foundation is a piece of thin batting, pinned to my design wall.  The next step was to paint a piece for the sky - It's a little too dark, but since this is my first time to do this, I figured I'd be content with the results.  then, I cut the bottom pieces from the lighter fabric, and placed it under the cuts so that it made the design more interesting.
 The plastic overlay is lowered so that I can place each piece in the proper place.  This is a detail with the first hills and greenery.
 Ditto.
 I've come quite a way - the color in the above picture isn't true because of the light in the room.
I took the lower picture by natural light from the window, and the colors are more true.
My biggest decision at this point is whether or not I'll want to leave the white borders on, or cut them off, or border the pictures with a thin black border.  So, sisters, dear, I await your helps with this decision.  Be sure to click on these to enlarge so that you can see what I'm talking about.  (At this stage, only the hills and fields are secured permanently to the backing.)

Thursday, May 1, 2014

Tulips and a Blaze of Glory!


These are my favorite tulips.  I wish I remember what made them so special.  They have been planted in this spot south-west of the house for years, and always come up in a blaze of glory, as well as being the same wonderful big blooms.  (all of my other tulips seem to get smaller and smaller every year, but I refuse to tear them out and plant new ones.)  Tulips are so amazing - along with daffodils and hyacinths, they really bring spring to our mostly chilly climate.

Tuesday, April 8, 2014

Winding Ways #2 - Borders Corrected

After really looking at the pictures I posted yesterday of this miniature quilt, the apparent flaws in the borders stuck out like a sore thumb.  After talking with Louise, I realized that the borders had to be re-done - here is the result.  Much better.  And they look straighter than in the picture above - with my just holding the camera, I still get some keystoning (didn't figure out the exact center, so the left looks a little wobbly.)  However, I'm more satisfied.  A famous quilter once said, "Better finished than right", but this time, I needed to correct my mistake.

Friday, April 4, 2014

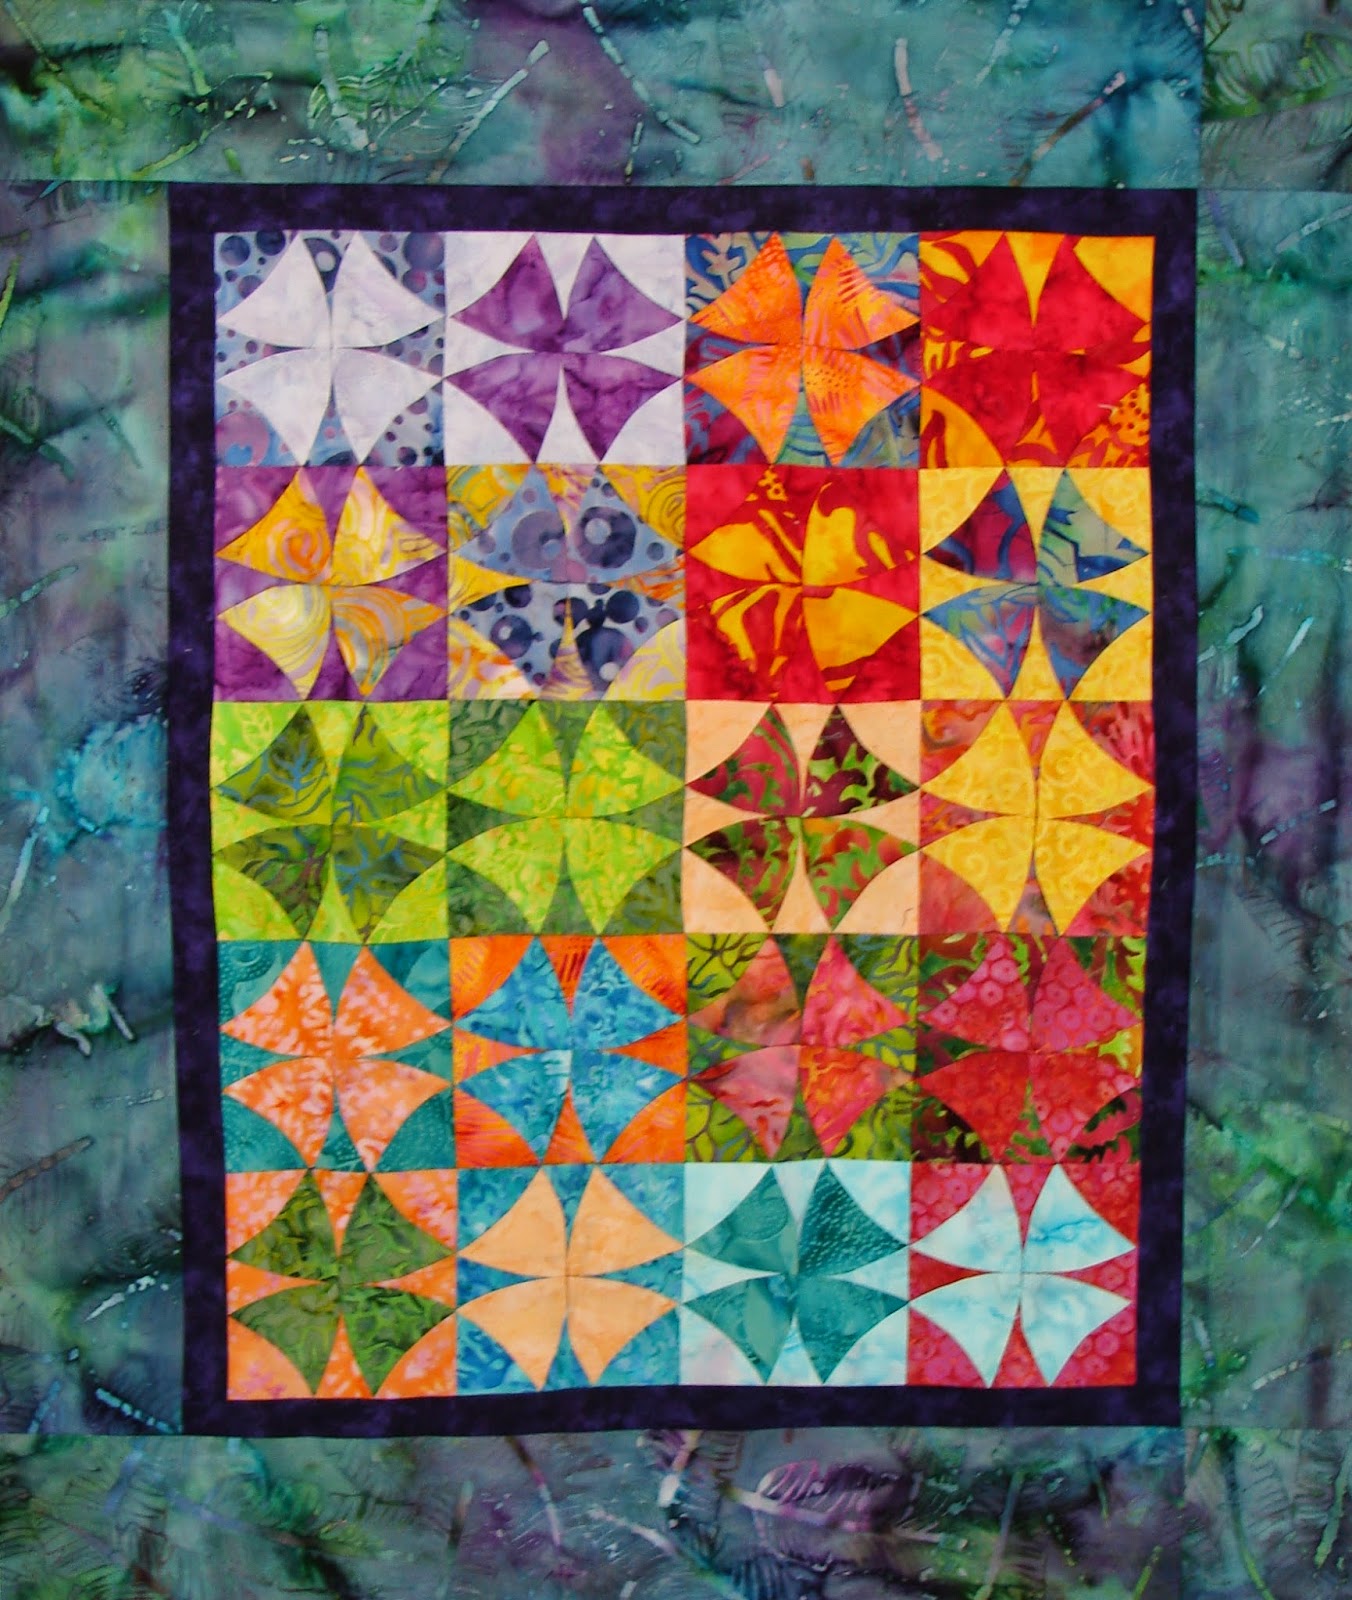
Another Miniature Quilt - Winding Ways

The Winding Ways quilt pattern has always been a favorite.  I love the secondary patterns in it that you will see if you click on the quilt to enlarge it.  This was a kit, with the pieces already laser cut.  I don't think that I would have the patience to cut the tiny pieces used to create this mini.  I'm still having a problem with the bottom dark first border - there is a slight wow or bulge, and I've got to figure out how to fix it, but over all, I love the pattern and the colors.  Another UFO to click off as being half done.  Progress in the sewing room!

Monday, March 31, 2014

Li'l Twister Little Quilts

I  love the pinwheels that you make using a special ruler to cut up connected blocks.  For quite a while, I have cut up extra fabric into 5" squares.  How convenient to sew these squares together to make a table runner - Some of this fabric was in Mandy's graduation quilt - quite a few years ago.

 The second neat thing about making this quilt top, is that if you cut the first pinwheels carefully, you have small squares that can be trimmed to 2-1/2" squares, which, after being sewn together and then cut, you have a miniature pinwheel quilt.  Fun, right?
This is the second group - goes faster the second time.  
This is one of the best ways I know of to get rid of some winter blahs.  Make something useful while having the satisfaction of learning a new technique.  A recent article in one of our newspapers said that learning quilting and photography were two ways to keep our brains in a learning mode - I take a few pictures, but love the challenge of finding new ways to make pleasing patterns in fabric.
Now, I have a real excuse - keep this ancient mind in top form!  If you don't make quilts, it's not too late to begin.

Friday, March 7, 2014

View from Our Patio

While Tony was visiting, we had some pretty gray days, but the photo above is evidence that gray can be beautiful.  Be sure to click on the photo to enlarge it.

Friday, February 28, 2014

Friendship Quilt Block

This is the trial block for my contribution to our guild's friendship quilt that we're making this year.  I have made a few design changes, but, essentially, this is how my block looks.  It tells a story about the things I like to do.  I am sitting at the computer, have books to read, a small quilt on the side of the desk,  a picture on the wall (like to paint or sew pictures), and a genealogy pedigree chart.  Here I am - stick figure and all.  Now, I just have to finish embroidering another 14 blocks.  Oh, yes, and all of the other blocks will have me wearing my favorite color, yellow.  When you enlarge this, you will see all of my mistakes, but that makes this qualify for "folk art".  When we exchange our blocks in September, It will be fun to make a quilt of all of my friends interpretations of themselves and their favorite things.

Wednesday, February 26, 2014

Sunbonnet Sue Gone With the Wind


This is supposed to be the year for finishing.  So many unfinished quilts just tucked away here and there, and they need to be completed, and this quilt was at the top of the list.   The keystone effect on the top picture makes the finished quilt look crooked - it quilt is actually straight on the sides.
I began appliquéing Sue in 1994 while we were still living in Tumwater.  It took me six years to get the blocks finished, and the quilt constructed.  Originally, the pattern showed blocks sticking out from the side of the quilt, making a "dramatic" edge  - hills and valleys, or Vs.  I began hand quilting this quilt in 2000, taking it with me to Mesa in the winter, and quilting on it rather sporadically during the next five years, and coming back home each year to sit on the shelf.  When we sold our little place in AZ, the
quilt was truly shelved.  However, since this is the year to finish things, I retrieved it, and, with the help of niece Cheryl's recommendation about a "beanbag" bottom lap hoop from Barnett's (internet), I have actually completed it.  However, one sad thing - or not - When I would finish quilting in the evening, I would just lay the quilt, hoop and all, on the floor by my chair, not realizing that part of an edge piece was over the floor vent for the furnace.  The result was a pretty ugly scorch, which would not come out.  The result - the quilt got squared off - no jutting-out Vs, and a simple binding to finish it.  I am not really a wonderful hand quilter - just too impatient to get on to the next project, I guess.  Nevertheless, it is finished!

Thursday, February 6, 2014

Snap-top bags

 It's always difficult to know what to give neighborhood children when they have birthdays - and we have such cute neighborhood children.  These bags aren't very big - just enough to hold a few treasures.
 A little girl's bag has to have a ruffle or two -
I love the internet. Just by searching, you can find so many wonderful things to make.   One of the ladies in our Preston Piecers quilt guild found this pattern last fall.   The most unique part of the bag is that the casings at the top contain pieces of a carpenter's tape measure, cut to measure the length of the casing, and then trimmed and taped several times with either masking tape or duct tape to keep them from cutting through the fabric.  When the pieces of tape measure are inserted correctly, the top is sealed with a satisfying snap, so that nothing can tumble out.  Now, a few treasures, and these are ready for gifting.  The neat thing about this bag is that it can be made much larger, or smaller (coin purse), and I can think of a multitude of uses, from a coin purse to a wallet. - or even larger for who knows what?

Wednesday, January 29, 2014

Birthday Gift From The Gourd Lady

This is Ron's birthday present from his sister, Evie, who is truly a magician with gourds.  This bird house will not hang out in the trees this summer, but will be put where we can enjoy it.  The carefully and precisely carved design had to take a lot of time, and the effect is a "wow".
 These two pictures are the back of the gourd - Love the dash of turquoise - it sets everything off nicely.
 This picture shows a more true color of the gourd.  So glad that Ron had a birthday to celebrate!

The rather ugly winter weather must be blamed for the hiatus in the family blogs, with the exception of Dwight and his Curmudgeonly Professor, which keeps the wit and pictures coming.  We have had bitter cold weather, but the sun in the daytime has eroded the edges of the snow so that some of the grass is showing.  And this morning there is a light, steady snow to chase the inversion away.  As we live in the north end of Cache Valley, our atmospheric effects from the inversion are not as heavy as Logan, itself.

Thursday, January 16, 2014

Beautiful Great Grandchild

Doesn't he look like a winter?  Fortunately for us, Jet's father is a photographer, and posts pictures on Facebook for us to admire.  This little guy has really grown.  I don't frequent Facebook often, and usually just browse, but it's a boon to great-grandmas like me, so that we can see these children who live far away. We live in a town where, often, families in close proximity. Great-grandparents, grandparents, mothers & fathers, children, etc., etc. all live in or near the community.  That's how life used to be for many.  However, we are prey to the logistics of society today - the jobs are far away, and ever evolving.  Once my aunt Cindy and uncle Norman moved to Smithfield, Utah and built a home to be near two of their children and families.  Within a couple of years, those children had moved away to follow employment opportunities.  My aunt and uncle stayed in Smithfield, and both are buried in the Smithfield cemetery, far away from their parents' burial place in northwestern Wyoming.  Such is life!

Wednesday, January 15, 2014

Wintry Morning from our window.

We've just been very, very cold this year - and the mornings have not been spectacular.  This picture is from a year ago - I don't remember if the day was glorious, but the sunrise certainly was.  It is wonderful to have this beautiful scene in its varying aspects at our back door.  Count my blessings.

Wednesday, January 8, 2014

Down by the Riverside


This long-ago wintry day was celebrated by Louise, Judy, and me with a walk down to the river in the snow.  We were dressed pretty warmly, but it was the idea of the photographer (me) to have them pose in the snow.  Dumb idea, but the pictures, taken with the old Baby Brownie, turned out okay.  Louise must have been  working away from home,and was home for the weekend.  Maybe you remember?
Anyway, these are good memories - I would probably have forgotten this time, except for the pictures that remain to tell about it.